Setting up a punching bag is a fundamental step for any gym, martial arts club, boxing academy, or home gym. Whether you’re a seasoned trainer or just starting, knowing how to properly hang a punching bag ensures safety, durability, and optimal training effectiveness. This comprehensive guide will walk you through everything you need to know about selecting, mounting, and maintaining your heavy bag, making your training space both functional and professional.
Why a Punching Bag is Essential for Your Gym
A boxing bag is more than just a training tool; it’s a cornerstone of martial arts and boxing training facilities. Incorporating a heavy punching bag into your gym or home gym setup offers numerous benefits:
- Skill Development: Enhances punching techniques, footwork, and overall boxing skills.
- Strength and Conditioning: Builds muscle strength, endurance, and cardiovascular fitness.
- Stress Relief: Provides an effective outlet for stress and aggression.
- Versatility: Suitable for various martial arts disciplines, including boxing, kickboxing, and MMA.
By investing in a high-quality heavy bag, you not only improve the training experience for your members but also elevate the overall value of your gym or club.
Choosing the Right Heavy Bag for Your Needs
Selecting the appropriate heavy punching bag depends on several factors:
1. Weight and Size
- Standard Bags: Typically range from 70 to 150 pounds. Choose a weight that matches the skill level of your users.
- Mini Bags: Ideal for speed and accuracy training, usually weighing between 20 to 40 pounds.
- Water Bags: Offer adjustable weight by adding water, making them versatile for different training needs.
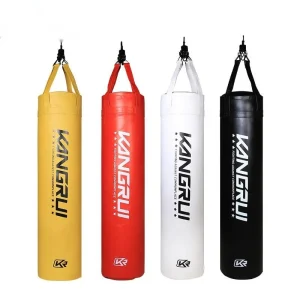
2. Material
- Leather: Durable and provides a traditional feel, suitable for heavy use.
- Synthetic Leather (PU): More affordable and resistant to moisture, making them ideal for indoor use.
- Canvas: Budget-friendly but less durable, suitable for light training.
3. Filling
- Sanding: Provides a solid feel, ideal for strength training.
- Textile: Offers a softer impact, suitable for beginners and speed training.
- Water: Allows weight adjustment, providing versatility for various training intensities.
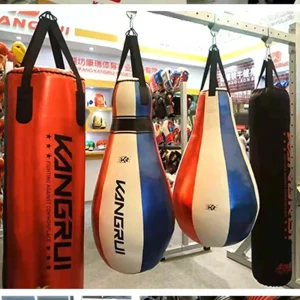
4. Purpose
- Boxing Training: Look for bags with a good swing for practicing punches and combinations.
- Kickboxing/MMA: Consider bags with multiple hanging points to accommodate kicks and strikes.
| Bag Type | Weight Range | Material | Best For |
|---|---|---|---|
| Standard Heavy | 70-150 lbs | Leather/PU | Boxing, Kickboxing |
| Mini Bag | 20-40 lbs | PU/Cotton | Speed, Accuracy Training |
| Water Bag | Adjustable | PU | Versatile Training Needs |
| Canvas Bag | 50-100 lbs | Canvas | Light Training, Budget-Friendly |
Choosing the right heavy bag ensures that your training sessions are effective and safe, catering to the specific needs of your gym or club members.
Different Methods to Hang a Punching Bag
There are several ways to hang a punching bag, each with its own set of advantages and considerations:
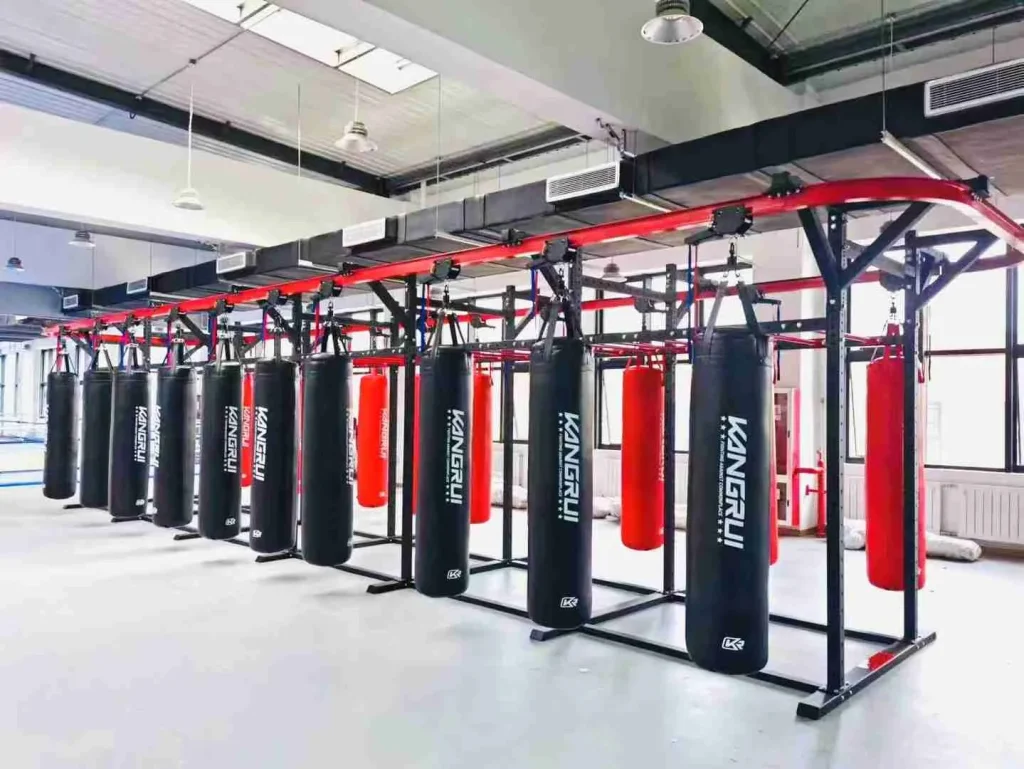
1. Ceiling Mount
A popular method for home gyms and facilities with adequate ceiling space. It provides stability and allows the bag to swing freely.
2. Wall Mount
Ideal for spaces where ceiling mounting isn’t feasible. Requires sturdy wall anchors and ensures minimal movement.
3. Free-Standing Stand
Offers flexibility as the bag can be moved easily. Perfect for multi-purpose gyms and those with limited space.
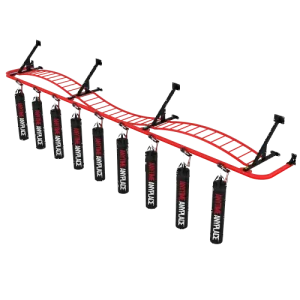
4. Heavy Bag Stand
A dedicated stand that provides a stable base, eliminating the need for ceiling or wall mounting.
Each method has its own installation requirements and suitability based on the available space and the type of training conducted.
Step-by-Step Guide to Mounting a Punching Bag
Mounting a heavy punching bag involves careful planning and the right tools to ensure safety and durability. Here’s a comprehensive step-by-step guide:
1. Choose the Right Location
- Space: Ensure there’s enough room for the bag to swing without obstruction.
- Support: Identify a sturdy ceiling joist or wall stud to bear the weight.
- Height: Hang the bag so that it reaches mid-chest level when standing.
2. Gather Necessary Tools and Materials
- Mounting Hardware: Eye bolts, swivel mounts, or heavy-duty hooks.
- Tools: Drill, stud finder, measuring tape, level.
- Safety Gear: Gloves and safety glasses.
3. Locate the Support Beam or Joist
Use a stud finder to locate a solid ceiling joist or wall stud. This is crucial to support the weight of the heavy bag and prevent structural damage.
4. Install the Mounting Hardware
- Ceiling Mount:
- Drill a pilot hole into the joist.
- Screw in an eye bolt securely.
- Attach a swivel to allow the bag to move freely.
- Wall Mount:
- Drill into the wall stud.
- Install a heavy-duty hook or bracket.
- Attach the bag chains securely.
5. Hang the Punching Bag
Attach the chains or straps to the mounting hardware, ensuring that the bag hangs evenly and is securely in place. Double-check all connections for stability.
6. Test the Setup
Before full use, gently swing the bag to ensure it is properly mounted and can handle the impact. Make any necessary adjustments to the height or stability.
By following these steps, you can safely and effectively mount a punching bag that will serve your training needs for years to come.
Using Ceiling Joists for Maximum Stability
Ceiling joists are the most reliable support for hanging a heavy punching bag due to their strength and structural integrity. Here’s how to utilize them effectively:
1. Identify the Joist Location
Use a stud finder to accurately locate the center of a ceiling joist. This ensures the mounting hardware is anchored securely.
2. Drill Pilot Holes
Drill pilot holes slightly smaller than the diameter of the eye bolts to prevent splitting the wood. This provides a stable base for the bag.
3. Install Eye Bolts
Screw in heavy-duty eye bolts into the pilot holes. Ensure they are tightly secured and can handle the weight of the bag.
4. Attach Swivels and Chains
Connect swivels to the eye bolts and attach the chains or straps. Swivels help reduce wear and tear by allowing the bag to rotate naturally during training.
5. Regular Inspection
Periodically check the mounting points and hardware for signs of wear or loosening. Tighten as necessary to maintain stability.
Using ceiling joists effectively not only provides maximum stability but also extends the lifespan of your boxing bag setup.
Wall Mount vs. Ceiling Mount: Which is Better?
Choosing between a wall mount and a ceiling mount depends on your specific needs and the available space. Here’s a comparison to help you decide:
| Feature | Ceiling Mount | Wall Mount |
|---|---|---|
| Stability | Highly stable when mounted on joists | Stable if properly anchored to studs |
| Space Utilization | Utilizes ceiling space, freeing up the floor | Occupies wall space, may limit other uses |
| Installation | Requires access to ceiling joists | Requires precise wall stud identification |
| Bag Movement | Allows free swinging and rotation | May restrict movement depending on wall space |
| Flexibility | Fixed position, less movable | Can be easier to relocate with proper setup |
When to Choose Ceiling Mount
- Ample Ceiling Space: Ideal for gyms and large training areas.
- Maximum Swing: Perfect for intensive boxing and martial arts training.
- Permanent Setup: Suitable for facilities looking for a long-term solution.
When to Choose Wall Mount
- Limited Ceiling Space: Best for smaller rooms or home gyms.
- Space Constraints: Useful when floor space is at a premium.
- Versatile Placement: Allows placement in different areas without altering the ceiling structure.
Ultimately, both mounting options can be effective when implemented correctly. Assess your space, training requirements, and installation feasibility to make the best choice for your boxing gym or home setup.
Installing a Punching Bag Stand for Flexibility
A punching bag stand offers the ultimate flexibility, allowing you to move the bag as needed without permanent installations. Here’s how to set one up:
1. Choose a Quality Stand
Invest in a sturdy stand designed to support the weight of your heavy punching bag. Look for features like adjustable height and stability enhancements.
2. Assemble the Stand
Follow the manufacturer’s instructions to assemble the stand securely. Ensure all bolts and connections are tight to prevent wobbling.
3. Attach the Punching Bag
Connect the bag chains to the top of the stand. Make sure the bag hangs at the desired height and swings freely without obstruction.
4. Stabilize the Stand
For added stability, place the stand on a flat, even surface. Some stands come with additional weights or bases to enhance support.
5. Adjust for Optimal Use
Customize the height and swing of the bag based on the user’s height and training focus. This ensures a personalized training experience.
Benefits of Using a Stand
- Portability: Easily move the bag to different locations.
- No Ceiling or Wall Damage: Ideal for renters or those unwilling to make permanent changes.
- Multi-Purpose Use: Can be used in various settings, including outdoor spaces.
A punching bag stand is a versatile solution that caters to dynamic training environments, making it a popular choice for both home gyms and professional facilities.
Safety Tips for Hanging Your Heavy Bag
Ensuring the safety of your heavy punching bag setup is paramount. Follow these tips to prevent accidents and maintain a secure training environment:
1. Use Heavy-Duty Hardware
Select high-quality eye bolts, hooks, and mounting hardware that can support at least twice the weight of the punching bag. This provides an extra safety margin.
2. Check the Structural Integrity
Before installation, inspect the ceiling joists or wall studs for any signs of damage or weakness. Avoid mounting in areas with compromised structural integrity.
3. Proper Installation
- Ceiling Mount: Ensure the eye bolts are screwed tightly into the joists. Use a level to keep the bag hanging straight.
- Wall Mount: Drill into the center of wall studs and use appropriate anchors to secure the hooks.
4. Regular Maintenance
Periodically inspect all mounting points and hardware for wear, rust, or looseness. Tighten connections as needed and replace any damaged components promptly.
5. Use Swivels
Incorporate swivels to reduce strain on the mounting points caused by the swinging motion of the bag. This minimizes the risk of hardware failure.
6. Secure the Bag Chains
Ensure that the chains or straps are firmly attached to both the bag and the mounting hardware. Double-check for any signs of fraying or stretching.
7. Limit Overuse
Avoid overloading the bag by adhering to the manufacturer’s weight recommendations. Excessive weight can compromise the stability and longevity of the setup.
By adhering to these safety practices, you can enjoy a secure and effective boxing bag training setup, minimizing the risk of accidents and equipment failure.
Maintaining Your Punching Bag for Longevity
Proper maintenance of your punching bag ensures its durability and performance over time. Follow these maintenance tips to keep your bag in top condition:
1. Regular Cleaning
- Surface Cleaning: Wipe down the bag with a damp cloth after each use to remove sweat and debris.
- Deep Cleaning: Periodically clean the bag with mild soap and water to prevent odor buildup and bacterial growth.
2. Inspect for Damage
- Check for Tears: Look for any signs of tearing or punctures in the bag material. Repair minor damages promptly to prevent further wear.
- Examine Chains and Straps: Ensure that all chains and straps are intact and free from rust or fraying.
3. Rotate Usage
If you have multiple bags, rotate their usage to distribute wear evenly. This extends the lifespan of each bag by reducing constant strain on a single unit.
4. Protect from Moisture
Keep the bag in a dry environment to prevent mold and mildew. Avoid placing it near sources of moisture or in areas with poor ventilation.
5. Lubricate Swivels
Apply a small amount of lubricant to the swivels to ensure smooth movement and reduce friction. This prevents the swivels from seizing up over time.
6. Tighten Mounts
Regularly check and tighten all mounting hardware to maintain stability. Loose mounts can lead to uneven swinging and potential damage.
7. Cover When Not in Use
Use a protective cover to shield the bag from dust and environmental elements. This helps maintain its appearance and integrity.
8. Replace Worn Parts
Over time, certain components like chains or hooks may wear out. Replace these parts as needed to ensure the continued safety and functionality of your punching bag setup.
Maintaining your heavy punching bag not only prolongs its life but also ensures that it remains an effective tool for training and conditioning.
FAQ
Choose a location with ample space for the bag to swing freely without obstruction. Ensure the mounting point is secure, preferably a ceiling joist or wall stud, to support the weight. Consider the height so the bag reaches mid-chest level when standing.
Using a ceiling mount is often the best method for home gyms due to stability and minimal floor space usage. Ensure the ceiling joist is strong enough and use heavy-duty mounting hardware. Alternatively, a free-standing punching bag stand offers flexibility without permanent installation.
Use a drill bit that matches the size of your mounting hardware, typically a masonry or wood bit depending on your wall or ceiling type. Always drill pilot holes to prevent splitting the joists or studs and ensure a secure fit for the eye bolts or hooks.
Standard ceiling mounts are designed to support at least 200 pounds, which is more than sufficient for most heavy punching bags. However, always check the specifications of your mounting hardware and ensure it exceeds the weight of your bag for added safety.
If your ceiling joist is not strong enough, consider installing additional support beams or using a heavy-duty punching bag stand. Alternatively, consult a structural engineer to reinforce the joist or explore other mounting options like wall mounts with reinforced anchors.
Inspect your punching bag setup at least once a month. Check for any signs of wear, loose hardware, or damage to the bag itself. Regular maintenance ensures safety and extends the lifespan of your equipment.
Summary: Key Takeaways
- Essential Equipment: A heavy punching bag is crucial for skill development, strength conditioning, and stress relief in any gym or home setup.
- Proper Selection: Choose the right bag based on weight, material, filling, and purpose to meet your training needs.
- Mounting Methods: Decide between ceiling mount, wall mount, free-standing stand, or a heavy bag stand based on your space and flexibility requirements.
- Safety First: Use heavy-duty hardware, secure mounting points, and regularly inspect your setup to prevent accidents.
- Maintenance Matters: Regular cleaning, damage inspection, and proper storage prolong the life and performance of your punching bag.
- Flexibility with Stands: A punching bag stand offers mobility and ease of setup, ideal for versatile training environments.
- Ceiling Joists are Key: Utilize sturdy ceiling joists for maximum stability when mounting your bag.
- Choose Wisely: Whether opting for a ceiling mount or a wall mount, ensure the method aligns with your gym’s layout and training intensity.
By following this ultimate guide, you can set up a safe, effective, and long-lasting punching bag system tailored to your gym or home training needs. Investing in the right equipment and maintaining it properly ensures that your training remains consistent, safe, and highly effective.
For more information on Custom Boxing Gloves, Punching Bags, and other Boxing Gear, visit our Sports Good Manufacturer page.